Tag Archives: snacks

Balsamic Roasted Sunflower Seeds

This is so simple, and I discovered this without really being intentional.

I got a CRAZY good deal on raw, hulled, unroasted sunflower seeds from Wholeshare (check it out here, all my fellow peeps in New York!).  I was throwing them on salads, eating them occasionally just as they were, but they were still sitting there.  Consuming space in my cupboard.

So, I laid them out on the pizza stone.

Drizzled with olive oil, and balsamic vinegar.  Dusted with garlic and salt.

Balsamic Roasted Sunflower Seeds - Foodies Gone Real

I roasted them at 400* for 10 minutes.

Balsamic Roasted Sunflower Seeds - Foodies Gone Real

I pulled them out, gave them a stir then roasted for another 5 minutes.

Balsamic Roasted Sunflower Seeds - Foodies Gone Real

Oh YUUUUM.  Talk about queching a salt craving!  Enjoy as we have!

Strawberry Fruit Leather for Little Mouths

Hi. How are you feeling today?  Are you feeling like this?

Strawberry Fruit Leather- Foodies Gone Real

We are feeling a bit more like this:

Strawberry Fruit Leather for Little Mouths - Foodies Gone Real

I L-O-V-E winter, but I’m seriously missing fresh fruit.  It can be tricky this time of year, especially on a budget, and in the northeast.  So, I’m going to introduce you to a crazy simple snack for which that my five-year-old’s mouth thanks me.  My mouth thanks me, too.

Meet strawberry fruit leather.

Strawberry Fruit Leather for Little Mouths - Foodies Gone Real

So if pleasing the little people in your house isn’t the ONLY reason for making this, here are some others:

  • 1/2 cup of fruit equals 1 serving of fruit.  Therefore, my cutting this up into 12 servings means you are giving your family one serving of fruit without it really feeling like a fruit. (My kids equate this to dessert!)
  • Berries are some of the highest fruits in antioxidants (source here).  Berries are considered by many to be some of the healthiest, bang-for-your-buck fruit (all the other vitamins and benefits of eating colors – see my post here), but in the dead of winter (especially where in a region that is winter for nearly 6 months), feeding a fresh berry habit can be expensive.  FROZEN fruit, on the other hand, much cheaper.
  • And if you’re not living in the tundra and berries are relatively cheap, this is an excellent preservation method.  When they go on sale and you want to make sure you can still eat the cheap berries when they aren’t so cheap, do this!
  • Convenience.  I will be first to admit that I give my kids snacks when running errands to keep good behavior.  They think they’re getting a treat, I know they’re getting a cheap fruit snack and a few more minutes of sanity in a public place.

So! Here’s how you do it:

TOOLS:

  • Dehydrator, preferably one that is square and doesn’t have a cylinder in the middle. There may be a way to do this with the cylindrical type (custom cutting your parchment??) but I haven’t tried.
  • Parchment paper or a silicone sheet used for dehydrating/baking
  • Blender

INGREDIENTS:

  • 6 cups of thawed strawberries, with their juices
  • 1 tbl sweetener such as raw honey, maple syrup, coconut sugar, rapadura (*really only necessary if you’re using frozen as they tend to be more sour)
  • Dash of water (*if you use fresh berries instead of thawed frozen, you might need to add even more water to get your blender to blend, this will be an eye-ball-process)

METHOD:

  1. Dump your berries, berry juice, sweetener into the blender. Little by little (I would suggest a tablespoon at a time), add water to your mix in the blender until the mixture is like a super thick smoothie.  The amount of water needed will change depending on frozen versus fresh, the ability of your blender. What you’re looking for is the right consistency.
  2. Spread this mixture over one lined (parchment or silicone) dehydrator tray.  It’s going to be thick, and that’s ok. Do NOT spread this over two trays; if you want to trays, double the recipe!
  3. Dehydrate at 135* for about 6 hours.  You can tell it’s done if you can touch the middle and it’s not mushy, and if you start to pull up the sheet of dried fruit puree and it comes off in one piece (no mushy bits left on the parchment/silicone).
  4. If it’s not dry yet, put it back in for another couple of hours.  The actual time it takes to do this is going to depend on how much liquid you started off with.
  5. If you’re unable to hang around and test the doneness of this, or you’d like to do it overnight, go low and slow.  Do steps 1 & 2, then set your dehydrator to 110* and leave it in there for at least 10 hours.  You’ll still have to test the doneness as mentioned in step #4, but this may work better if you want to do it while sleeping or at work.
  6. Cut them up into twelve long strips, and bag them, or cut parchment papers to size and wrap with a rubber band.

Needless to say, they don’t last long in my house.  Remember that picture at the top of this post? Before I finished typing it looked more like this.

Strawberry Fruit Leather for Little Mouths - Foodies Gone Real

Enjoy!

Sometimes, You Just Need to Munch.

Got a sweet tooth and demand a crunch? Munch on some chocolate roasted nuts, my friends.

Chocolate Roasted Nuts - Foodies Gone Real

We are addicted to crunch in this house.  My husband doesn’t think it counts as a meal unless there was plenty he had to chew.  He’s not totally off-base on this, either – there’s plenty of research that links chewing to being satiated.

BUT… coming off of junk food for this is HARD.

Ok, so there are plenty of real-foodists and paleo-people that will tell you just to chew up some raw almonds.  But sometimes, you feel like you just NEED junk! I’ve attempted several recipes that try to quench this craving.

None, however, are this crazy easy!

I promise you… this keeps both sides of your psyche calm, cool, and collected.

INGREDIENTS:

1/2 c chopped pecans
1/2 c chopped walnuts
1/2 c chopped almonds (or almond slivers will work for this, too)
1/2 c cocoa powder
1/4 c maple syrup
2 tbl coconut oil, room temperature (or liquid… just not in a hard/super-solid state)
sprinkle or two of salt (*DO NOT SKIP THIS!*)

DIRECTIONS:

Preheat your oven to 325 degrees.

Mix all the ingredients, except the salt.  You will have to mix this … for a couple of minutes.  Just keep mixing before adding anything.

If you think it’s too “liquidy,” add more chopped nuts of choice, 2 tablespoons at a time.  (I have had this happen occasionally – I think it depends on how warm the syrup and coconut oil are.  The runnier they are, the runnier the mix is.)  If you think it’s too “dry” – in that not all nuts are coated – drizzle a little more maple syrup on.

Here’s the trick on this:  when you stir and see the bottom of the bowl, you don’t want to find a bunch of nuts with no coating, nor do you want to see a bunch of liquid mix at the bottom.

Once it’s thoroughly mixed, sprinkle some salt, and mix again for another 10 seconds.

chocolate roasted nuts - Foodies Gone Real

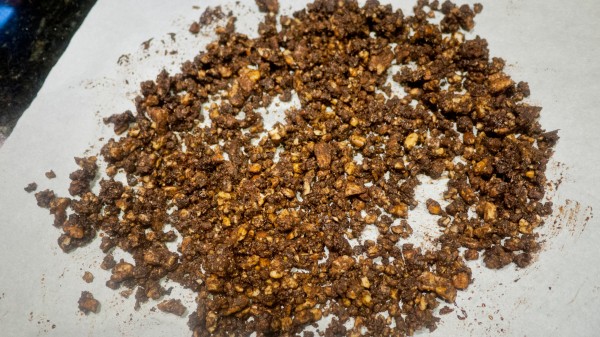
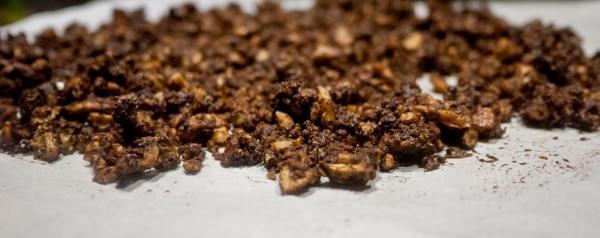
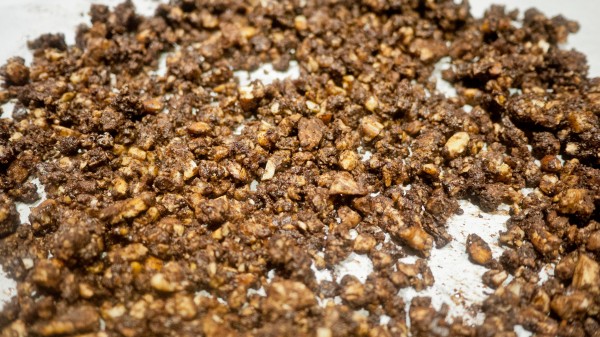
Spread the nuts on a parchment-lined baking sheet.

Bake for 15 minutes.  Pull out tray, stir them around, and put them in for another 5 minutes. *Leave your oven on* while you pull a nut and taste it.  It should feel a little crunchy, but not burnt.  If it still feels pretty soft, put back in the oven for another five minutes.

Pull them out and let cool.  Then gobble.  Ours are gone quick, eat them while you have the chance!

Chocolate Roasted Nuts - Foodies Gone Real


This recipe was featured as part of the Homestead Barn Hop.